Author: RYU

advertisements
  • How to Build a Mousetrap Car

    How to Build a Mousetrap Car

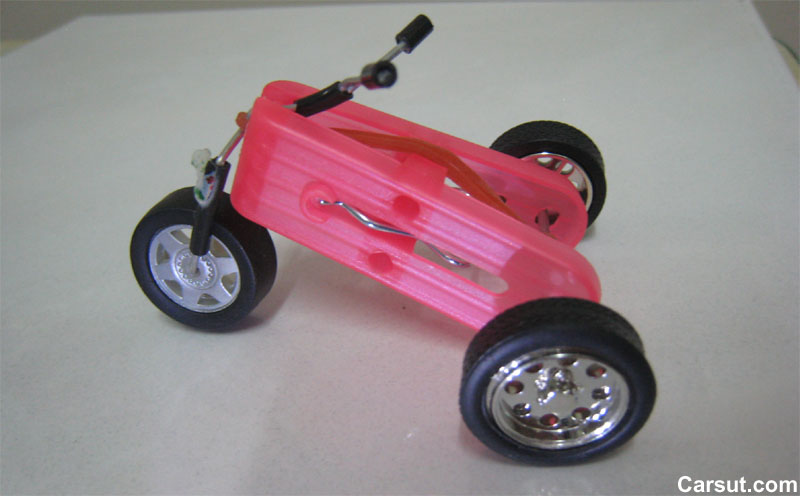
    The process of building a mousetrap car could bring you unlimited fun especially when a father and his son spend their time together. The fun is unimaginable and the steps are relatively simple. You may download some basic mousetrap car designs if this is your first time building a mousetrap car. Otherwise, if you are looking to build a fast cool mousetrap car, you will need a better designed car plans. A well-designed mousetrap car plans allows your car to go faster and further. If you are heading to any mousetrap car competitions in your schools or class, perhaps these few simple tips and steps to build a fast mousetrap car could help you out.

    Material Needed

    • Wheels. Prepare a piece of cardboard or foam core and elastic rubber bands.
    • Axle. Here we will use two dowel rods as the axle for the car.
    • Car Body. Of course it is a mousetrap. A better quality mousetrap will give you faster pickup. Look carefully the spring condition when buying one.
    • Tools: A pair of pliers, a pair of scissors, a pair of compass, epoxy glue, duct tape, 4 eye hooks, ruler, utility knife, and a flexible string.

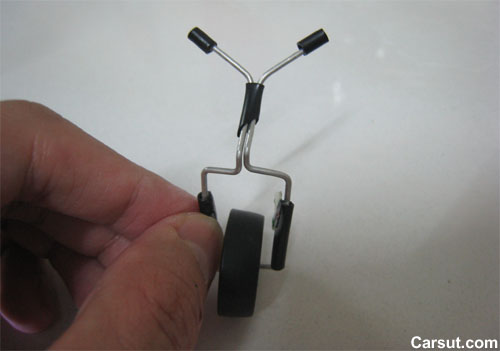
    Step 1: Create a set of four cool wheels using heavy cardboard. Use a pair of compass to measure the wheel size properly. Prepare four wheels where two wheels for the front are slightly smaller than another two. Use the elastic bands and attach it around the perimeter of the wheels you have just created. These bands work like car tires for the car. Make a small hole in the center of every wheel for the dowel rod.

    steps to build a mousetrap car

    Step 2: Use a utility knife to cut a piece of cardboard as the chassis. It must be slightly bigger (10-12cm) than the mousetrap on each side. Remove the rod on your mousetrap using a pair of pliers carefully. Place the mousetrap on the cardboard you just prepare and lock it with duct tape on each side.

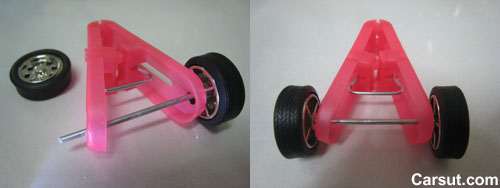
    Step 3: The third step is to build the axle of the car. Prepare 2 dowel rods which are slightly thinner than the eye hooks. Measure the size and make them 1-2 inches longer than the width of your chassis. Twist the four eye hooks into each corner of the chassis. This is to hold the axle.

    mousetrap car diagram

    Step 4: Slide both dowel rods through the eye hooks. Make sure it is able to spin nicely. Fix each wheel to the dowel rod through the hole you made in step 1. Secure the wheel with rubber band and apply some epoxy glue.

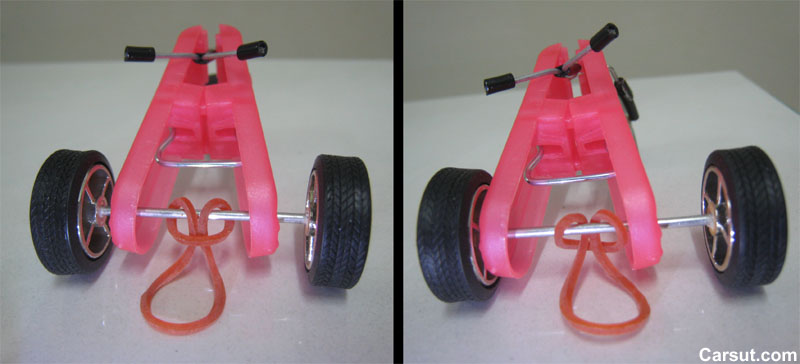
    Step 5: Tie one end of a string to the snapper arm of the mousetrap. Make a tight knot so that it won’t lose when the car runs. In order to make the car run, you will need to pull back the snapper arm and hold it tightly. Now wind the other end of the string around the rear axle (rear dowel rod) while you are holding back the snapper arm. Make sure you wind it with the right direction in order to make the car go forward. How to make it run then? Simply put the car on the ground and release your hand. You will notice the snapper arm jumps instantly and the power will be delivered to the rear wheel and make the car runs. Prepare a longer string if you want the car to travel further.

    mousetrap car

    Don’t worry if you feel your head is dizzy after reading the above instructions. You can always head to any online stores and get a set of ready-made mousetrap car kits. They are easier to build.

  • How to Make a Rubber Band Car Uniquely

    How to Make a Rubber Band Car Uniquely

    Thousands of rubber band cars were created each year just for the rubber band car competition. Some are really well designed while some are just a simple one. Here you can find a few easy steps on how to make a rubber band car uniquely by using a clothespin, a few toy car wheels, iron wire, some recycle stuffs, and a power rubber band. We guarantee you never seen this kind of rubber band car before because they are created uniquely. So, what are the things you need in order to create a fast rubber band car?

    Material and Tools Needed 

    • Prepare a good quality yet light-weight clothespin. The lighter the better because the car needs to go as fast as it can. Choose a cool looking clothespin as it will be the body of your rubber band car. Alternatively, you can use plastic botols, polyethylene foam, pinewood, cardboard, or other material. Creativity is what you need.
    • As for the wheels and axle, the fastest and easiest way is to get a set of cool wheels from any unwanted used toy cars. The idea we are sharing here needs only three wheels, kind of special right? We have seen other people use CD, wood, plastic, plastic + rubber, cardboard as wheels. Do you have a better idea?
    • Last but not least, prepare a piece of high quality rubber band. This is the most important because better quality rubber band allows better pickup as well as higher top speed.
    • Get ready a pair of scissors, a small knife, ruler, pencil, needle nose pliers, cutter, masking tape as well as glove and eyeglasses (for protection).

    Step 1: Nothing can be easier than using a clothespin as rubber band car body. This helps to save up a lot of your time. Now attach the axle and wheels you prepare to the clothespin through the hole. It should look like the alphabet “A”.

    rubber band car

    Step 2: Create a cool front steering and attach one wheel to the steering. Use the needle nose pliers to form the shape you want and cutter to cut the ion wire. You can also use some black mask tape to build the handle.

    rubber band car

    Step 3: Attach the front wheel and handle to the front of the clothespin (your rubber band car body). Now attach the rubber band you prepared to the real axle as shown in the instructions below. The left hand image is the correct way to do it while the right hand image is the wrong way to do it. Attach another end of the rubber band to the front handle you build in step 2.

    rubber band car

    Generally, most of the rubber band cars are attach to the front axle. However in our easiest way to build a fast rubber band car, you will only need to attach it to the front handle. What else now? Bring the car out and calculate the top speed!

    rubber band car
    Idea and images to make this rubber band car is taken from: Build a rubber band powered car.

  • Create Your Own Superhero with Marvel

    Create Your Own Superhero with Marvel

    Perhaps you should try out Marvel’s Superhero Avatar Creator if you are looking to create your own superhero. It is fun, amazing and awesome! Iron Man, Wolverine, Spider-Man, Hulk, or any superhero from Marvel is available online. You can play the mix-and-match game with the Superhero Avatar Creator. It has unlimited fun because you can place Spider-Man mask on Iron Man’s head, you can also design Iron Man costume and put them on Wolverine’s body. Hulk can use Thor’s Mjolnir Hammer too. Once you have completed your own superhero, you can save them into your local computer or send it to your friends. If you have never tried it before, here are the steps on how you can create your own superhero with Marvel.

    Step 1: Go to Marvel.com/games/play/31/create_your_own_superhero or hit the direct link here. You will then see five famous Marvel’s superhero and a huge BEGIN button in the middle. Let’s BEGIN!
    Create Marvel Superhero

    Step 2: Select a base body you want him or her to be your superhero. You can either select muscular guy body, Hulk body, or a sexy woman body.
    marvel-superhero-2

    Step 3: You will see a panel appeared at your left hand side and the base body you selected in Step 2 will be appeared at your right hand side. Iron Man, Spider-Man, Captain America, Wolverine, and Thor will be appeared under the Hero Packs if you choose a guy base body. Anything you click on the left panel will be fitted to the body immediately. Other than Hero Packs, the selections include skin types, head, upper body, lower body, and accessory. You can customize your own superhero avatar in any way you like. Your superhero can wear an eye glasses. He can go out with or without a mask or a headgear.
    marvel-superhero-3

    Step 4: Once you have select all the needed parts for your superhero, it is time for coloring. This online flash game allows you to have a huge selection of colors to put on any part you like. You can choose any colors for Spider-Man’s mask other than the typical red color. You can also customize Captain America’s costume and make it black and white instead of blue/red/white. Once you have created your own superhero, you can choose to save it, tweet it, or send it to a friend through email for free. That is! That is the four easy steps on how you can create a superhero with Marvel.